I concentrated on machine quilting this week, and you have already seen most of the results (blog posts of the last few days).
In between I worked on making scrap blocks. And then I came up with a setting for them, got that halfway done, and decided to re-design it. Now I have lots of ripping to do and then re-sewing. The new setting also required more blocks, so I made those late last night. (All of this you will see, eventually.)
I added borders to a top which will be quilted on a long-arm later this week.
I also became interested in my blue scraps and made a quilt top. Today I quilted and finished it. I decided to show you my method. I'm sure you already have your own ways of sandwiching and quilting, but I just thought I'd show you my method for fun. It's always interesting to see how other people do their quilting tasks, don't you think? So this is how I make a quilt sandwich that will be quilted on my domestic machine. (To those of you who wondered: no, a quilt sandwich is not edible.)
1) Set up table in spare bedroom. (Who am I kidding? It's probably already up, with junk on it. Toss junk onto bed.) The noise of setting up the table always scares the cat, so he's out of the way for a while.
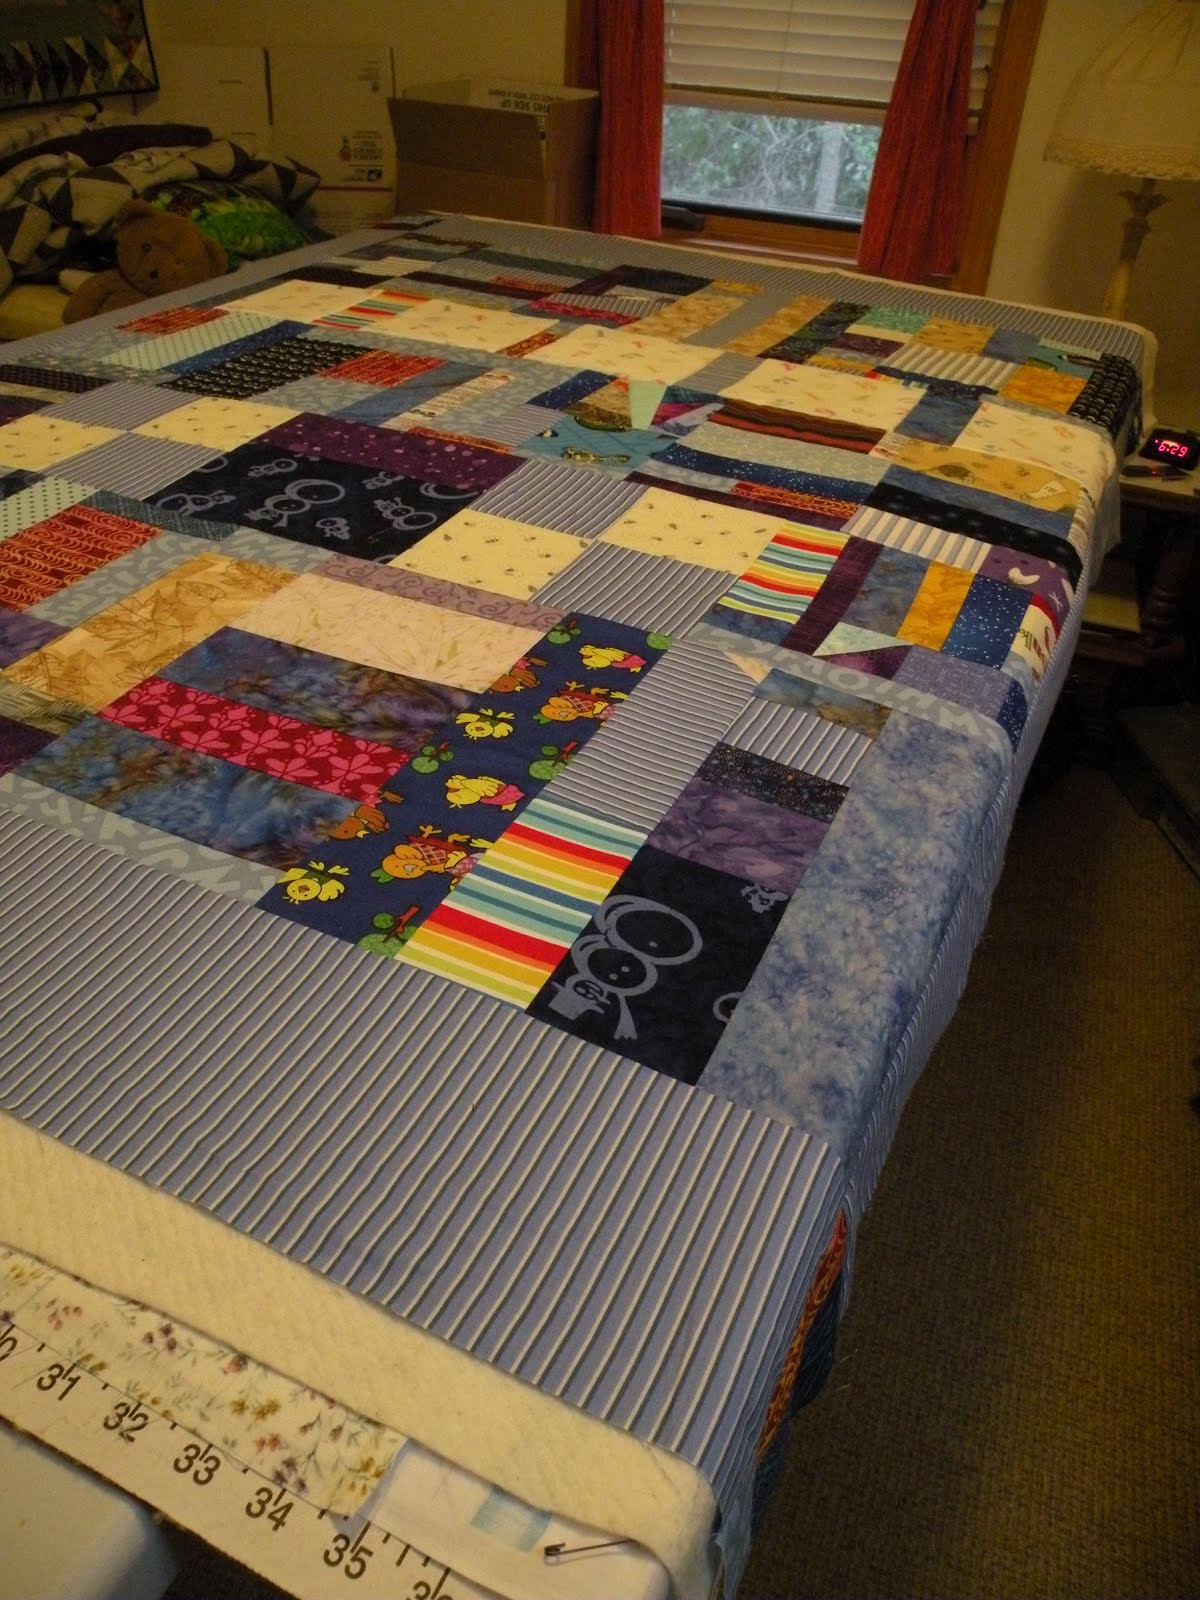
2) Pull out the cardboard thingy with inches and feet and yards printed on it. Put it on table top.
3) Lay out fabric backing piece. Oh, first, of course you have to iron it. Then lay it out, nice and flat, right side down, on the cardboard thingy. Pin it into place around the outside perimeter to keep it taut-ish.

4) Lay out the batting on top of the quilt backing. Smooth it out nice and flat.

5) Fold back half the batting, back on top of itself so half the backing fabric is revealed. Shake the spray baste can. If the cat has come back into the room, this noise will scare him, so he once again flees to a safe hiding place and is out of your way. Spray the batting with spray baste. Use an old magazine or paper to prevent the over-spray from getting on other items in the room. Pull the batting-half back into place and smooth it out carefully. Then pull back the other half and repeat this process. (Oh, if it's not 58 degrees below zero, you should have a window open while you use the spray baste.)

6) Put quilt top (having ironed it beforehand) on the batting, right side up. Position it carefully so that you know it will have both batting and backing fabric under all parts of the top. Smooth it into place.
7) Repeat the process of spray-basting, this time basting the top onto the batting, half at a time.
8) Be sure to remove the pins from the backing fabric and cardboard at this point. They might be between the quilt layers, and you'll have to lift carefully to get them out, then re-smooth the pieces back so they're flat.
9) If your top is wider than the table, you may have to shift the cardboard thingy over at this point and spray baste the parts you couldn't reach before because they were hanging down. Contrary to what this picture suggests, I would actually pull back along the whole length of the side that I missed in order to do as neat a job as I can with this second-step-basting. (Do both batting-to-backing and top-to-batting.) An ideal set-up would have two tables side by side, but obviously my set-up is not ideal.

10) At this point I use a few of the pins to pin the sandwich together in 4-6 places, just in case my spray basting fails or I need extra stabilization for some reason.
11) Turn on fan in the spare room to disperse the spray baste smell before husband has a chance to complain about it.
12) Take sandwich to your machine and quilt as desired.
13) Trim, add binding, finish binding, hang it up, photograph it, fold it, admire it, and marvel that in a couple of days you turned scraps into this beautiful, cuddly piece of love.


14) Before giving away quilt, wash it so you remove the smell of the spray baste, and the quilt gets that lovely crinkly look of comfort.
15) Smile and go make another quilt.
3 comments:
Oh Carole I do most of my spray basing very much like you do. But, I take it all outside. I used to use the basement for work shop but here at the cottage, I put it outside. Since I have resided myself to only quilting for about 7 months of the year so I do it outside.
Love, love the quilt by the way as scraps go, this design you used is awesome.
Funny! I have never used spray baste but was present when my sister used almost this exact same method at her house, except it was the dogs who went running :) Love your finished quilt!
I love your description of the process you use to get your quilts ready to quilt especially how you talked about the cat's antics.
I usually save the spray basting for small wall hangings but I am blessed to have a place to pin to an elevated table along with helpers to help pin. I know everyone doesn't have the luxury. I can pin my button ups which measure 22 x 42 on my cutting/pressing table so that's good!
Post a Comment