Well, machine quilting is a hard thing to do, and I thought maybe if I showed how I do it, some other folks might decide they could be brave enough to try it, too. Or would feel good about how theirs looks. Or something.
I took a class on machine quilting several years ago. It helped me a little; I'm glad I took the class. But what really helped the most was to just DO it. Practice, practice, practice. I mostly make charity quilts, and they go to other countries, and to children who might not notice or mind if the quilting was a little "off." That's what gave me the courage to do it.
If you have never tried machine quilting (the free-motion kind, not the stitch-in-the-ditch stuff with a walking foot), you maybe think it shouldn't be that hard. But I tell you, I was surprised at how hard it is! First, of course, one must sandwich the quilt with the backing and batting. That's a whole procedure in itself that I am going to ignore (some people hate this step, and I will tell you that I'm not all that fond of it myself; I have to be in the right mood). Let's assume that is all done. This stuff comes next:
*First, I put the darning foot on my machine, and remember to lower the feed dogs.
*Second, I have to set the presser foot lever to the special half-way point that it goes to on my Pfaff. I don't know if other machines have this setting. But it is imperative that I use this on my Pfaff. I'll show you what happens if I forget.
 See the small white sphere? Behind that is a clear, curved piece that goes down to the foot.. that whole piece is the darning foot. In this picture the feed dogs are still up.
 This is the lever on my Pfaff that needs to be set to this wonky half-way place in order to free-motion quilt.
 I always start with the needle down, and I can set it so it stops with the needle down. This is very helpful for keeping my lines properly shaped.
*While quilting, I have to run the machine pretty fast. It won't work well if I run it slowly.
*While running the machine fast, move the quilt sandwich at a regular and controlled pace which is not going to be as fast as you feel like it should be for the speed of the machine. It's kind of mind blowing. A person who does this well will have nice, even stitching. I don't do it well. My stitches range from tiny to big.
*You should practice and get good at doing shapes upside down and sideways, because the quilt will be moving all around at funny angles, and you might want certain shapes to go at certain angles. (This is another step I have not mastered.)
 "Quilt Police: These threads don't match!!"
OK, here's something you should know: I break rules! You know that they say while doing a simple meander you should not cross over your sewing lines? Pshaw! Why not? I do loop-de-loops and whatever I feel like doing. I cross over lines and start and stop wherever I need to or want to.
Here's another rule that I regularly break: use the same color thread in the top and in the bobbin. I often use two different colors! See? I'm a rule breaker. The consequence is that the bobbin thread shows through, like in this picture (above) where my top thread is a light blue, and the bobbin thread is a dark blue. If this color overlap bothers you, follow the rule. If not, do as you please.
 These two pictures, above and blow, are close-ups of how I usually start and stop. I do several stitches in one spot to lock it in, and then I loop around to make it harder to un-stitch itself. It's just how I do it.
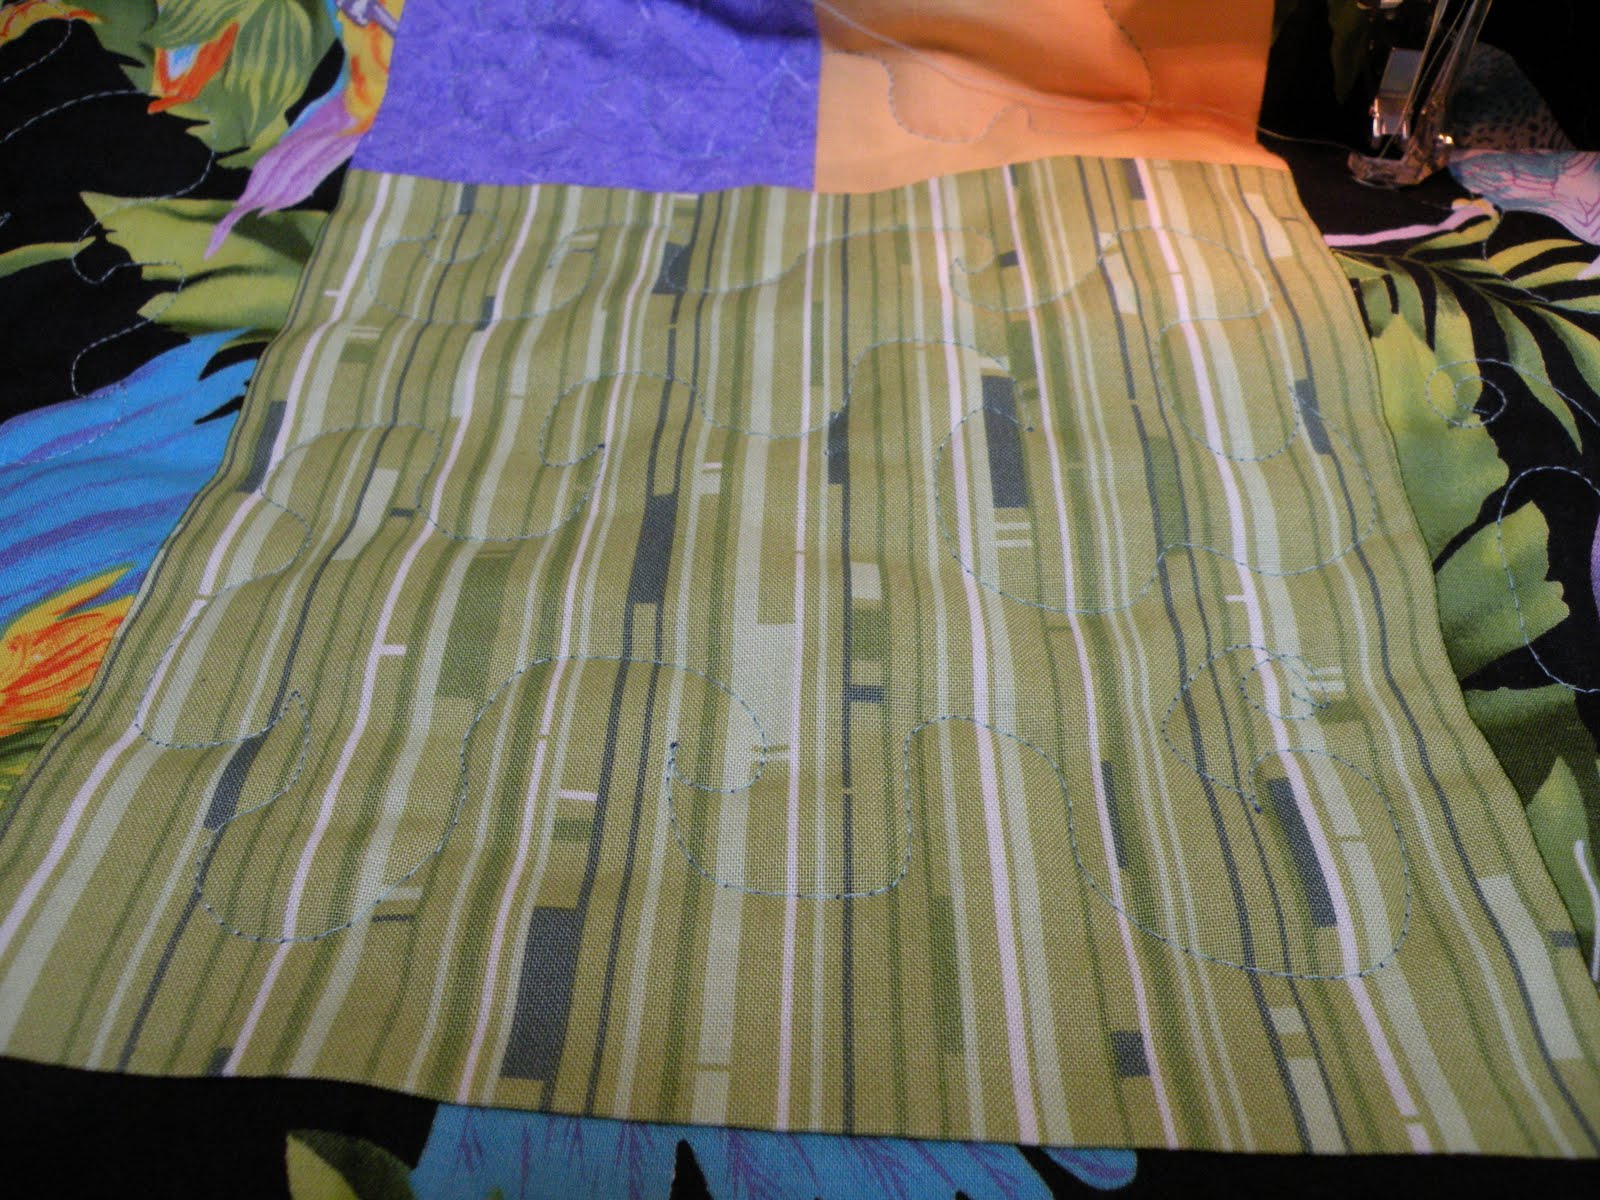
I have found that in general it overwhelms me to think of starting in and having to cover the whole quilt without stopping or crossing lines. (We already know what I do about that crossing-lines rule.) So.. I decided, why do I need to stick to that rule of only starting and stopping once? It's easier for me to think of doing a design in one block or one small area. So that's what I sometimes do.
In this blue and yellow quilt, I followed the blue diagonals and did loopy circles in those blocks. Then I decided just to fill in with little "eyeglasses" in the yellow blocks (I call them eyeglasses so no one will think they look like boobs). Actually this took more time than I expected, but it made me comfortable, so I went with it.

In the next quilt I made random waves or pointy blobs.. whatever they are. And again I decided to do a block at a time. Then in the small squares I made my usual pattern for meandering. I have found that I developed a habitual movement to create my meandering pattern. I think of them as jigsaw puzzle pieces, although they are not that exactly. It's just how I think of them as I move the quilt around. It kind of helps me keeep in the right rhythm.
With practice, I think you will develop your own meandering movement and will have your own pattern of bubbles, puzzle pieces, or blobs that emerge.

Now you get to see the loveliness that happens when I forget to set my little lever to the right half-way place for free-motion quilting. In the picture below, you can see that the tension is not right. It usually is not this obvious. I sometimes have quilted for quite some time without realizing it's wrong... although I must admit that in those cases I am often ignoring the fact that something sounds or feels wrong. In this example, it was obvious right away.

 This mess (above) is what happens on the quilt back when I forget to set that lever properly. What a beautiful mess! (arrgghh)
The picture below just shows one whole block that I just quilted as one separate unit. It's hard to see the quilting, really.. but I'm just showing this to let you know that you can do the quilting block by block if you want to.
Here's the back of the quilt. Hard to see much. But that's good, in my opinion. If you use a rather busy print on the back, it's harder to see the quilting flaws!
 Another bonus of doing quilting in small areas or block by block.. it's easier to avoid getting puckers on the back!
 All quilted.. just waiting for the binding.
 Also done, sans binding.
 This is just to show you that I also do walking-foot quilting. This one isn't done yet; I ran out of thread and was sick of filling bobbins, so I took a break.
I know of some very good quilters who said they have tried free-motion quilting and just couldn't do it. I think about them sometimes, and I think it's for them that I am posting this. I couldn't do free-motion quilting, either, if I felt I had to follow all the rules. That's why I developed my own way, and am encouraging others to try it, if they are interested, and to find their own way, too.
Is it easier to think about free-motion machine quilting in one block? Then do it that way. Sometimes when I get my mojo really hopping, I can whip through a quilt doing simple meandering pretty quickly (faster than stitch-in-the-ditch style, which I still do, but it gets boring, so I break it up with some free-motion stuff which is sort of scarey-fun).
Did this make any sense to anyone?? If I helped anyone have some courage to try machine quilting, that's cool. If not, that's cool, too. You can see that I will never excel and become a professional machine quilter. Uffda... I would never love doing it enough for that. I'm still a piecer and topper by preference. But I like that I at least CAN machine quilt and finish some of my own tops in a variety of ways.
Recently I put on my swimming suit and swam in a back-yard pool, right in front of a bunch of adults who I had just met. I was the only adult swimming with three 12-year-old boys. Afterwards a woman told me that next time she's going to just go for it, and swim, too.
So fatty old me with my fish-belly white skin and lumpy bod in a swim suit gave someone some courage. Maybe my "oh just go for it" style of machine quilting will give someone courage to try that, too.
4 comments:
This makes so much sense. I recently looked a quilt that I free motioned several years ago and I was surprised at how much better it looked than I remembered. I decided to try free motion again. One thing that really works for me is to put my machine on my dining room table. It supports the quilt instead of letting it hang. And you are so right, practice, practice, practice. I also have a Pfaff and I love it.
Love this post. I haven't heard Uffda since I lived in MN sixteen years ago! I just might try meandering again...so stressful to follow the rules. Who made them anyway?!?!?!? Thanks for permission to relax about it!
When I started quilting 2008, as I was reminded today, I didn't know what "free motion" meant, so just went back and forth five times in each blog. My first quilt is still the favourite of my granddaughter even though it's at my house now as it doesn't fit her bed, so she has a "professional" one that I then made doing actual free motion.
I love doing it, I start at the top of one corner...who will see the mistakes if made, in the corners?
I work in quarters sort of. I tell you those little squigglies at the back are usually because we haven't secured the bobbin thread!
But being good stitch pickers that we quilters are...it's easy.
I love free motion, but the first time I tried one of 365 days of free motion quilting simpler grasses, my sweetie asked if I had screwed up....
You said the magic word for getting better at anything---practice! I also agree that FMQ is "scary-fun". But you have to jump in and try scary things in order to get more confidence, absolutely! I recently changed my allover meander method from doing random quarters of the quilt, dragging it back and forth and around and backwards to get to the middle, to quilting edge to edge in rows. So much simpler! I like to think of puzzle pieces too, or the borders of a lake with inlets and jetties. Thanks for this post, it was great to read your method!
Post a Comment